Showing posts with label Halloween Neighbor Gifts. Show all posts

Thursday, August 4, 2016

Gotta See! "You've Been Booed" Printables and Treat Ideas for this Halloween plus Tutorials


Do you "Boo" your neighbors and friends with treats every Halloween? This cute Halloween treat cone is so much fun to do and very easy. All you need is scrapbook paper, wire and glue and our tags. 
  
Just pick your favorite cardstock for the cone and a matching paper for the ruffle an you've got something fun to give out this year.  Our "You've been booed" tags will make it even cuter. 


Be sure to place both of these printables inside the cone. Just roll them up and tie with ribbon and slip inside next to the treats.  One prints tells them that they have been "Booed" and the other is for them to put on their door or front window to let others that they have already been "Booed"  You can either fill the entire cone with treats or just the top part.


Don't forget to put the "You've been booed" printable sheets inside the cone when you leave it for your neighbors. 


We've designed 8 different tags to put on the treat cone.  Which one is your favorite? Can't choose? Just use one for each treat you make up.  We backed them with a black circle measuring 3.25"  but that is totally optional too.


You can either fold the paper to make a ruffle or you can fold AND stitch it as we have done above.  Then just adhere the ruffle to the cone and add the tag.  We inked the ruffle to distress it. (optional)   


This is a smaller version. We cut a 8" x 8" piece of Halloween cardstock to make the cone. Then we cut three pieces for the ruffle.  Just glue all three pieces together so you have one piece.  We folded and stitched this one too.  Fill the cone with crinkle paper and your treats sit atop it.
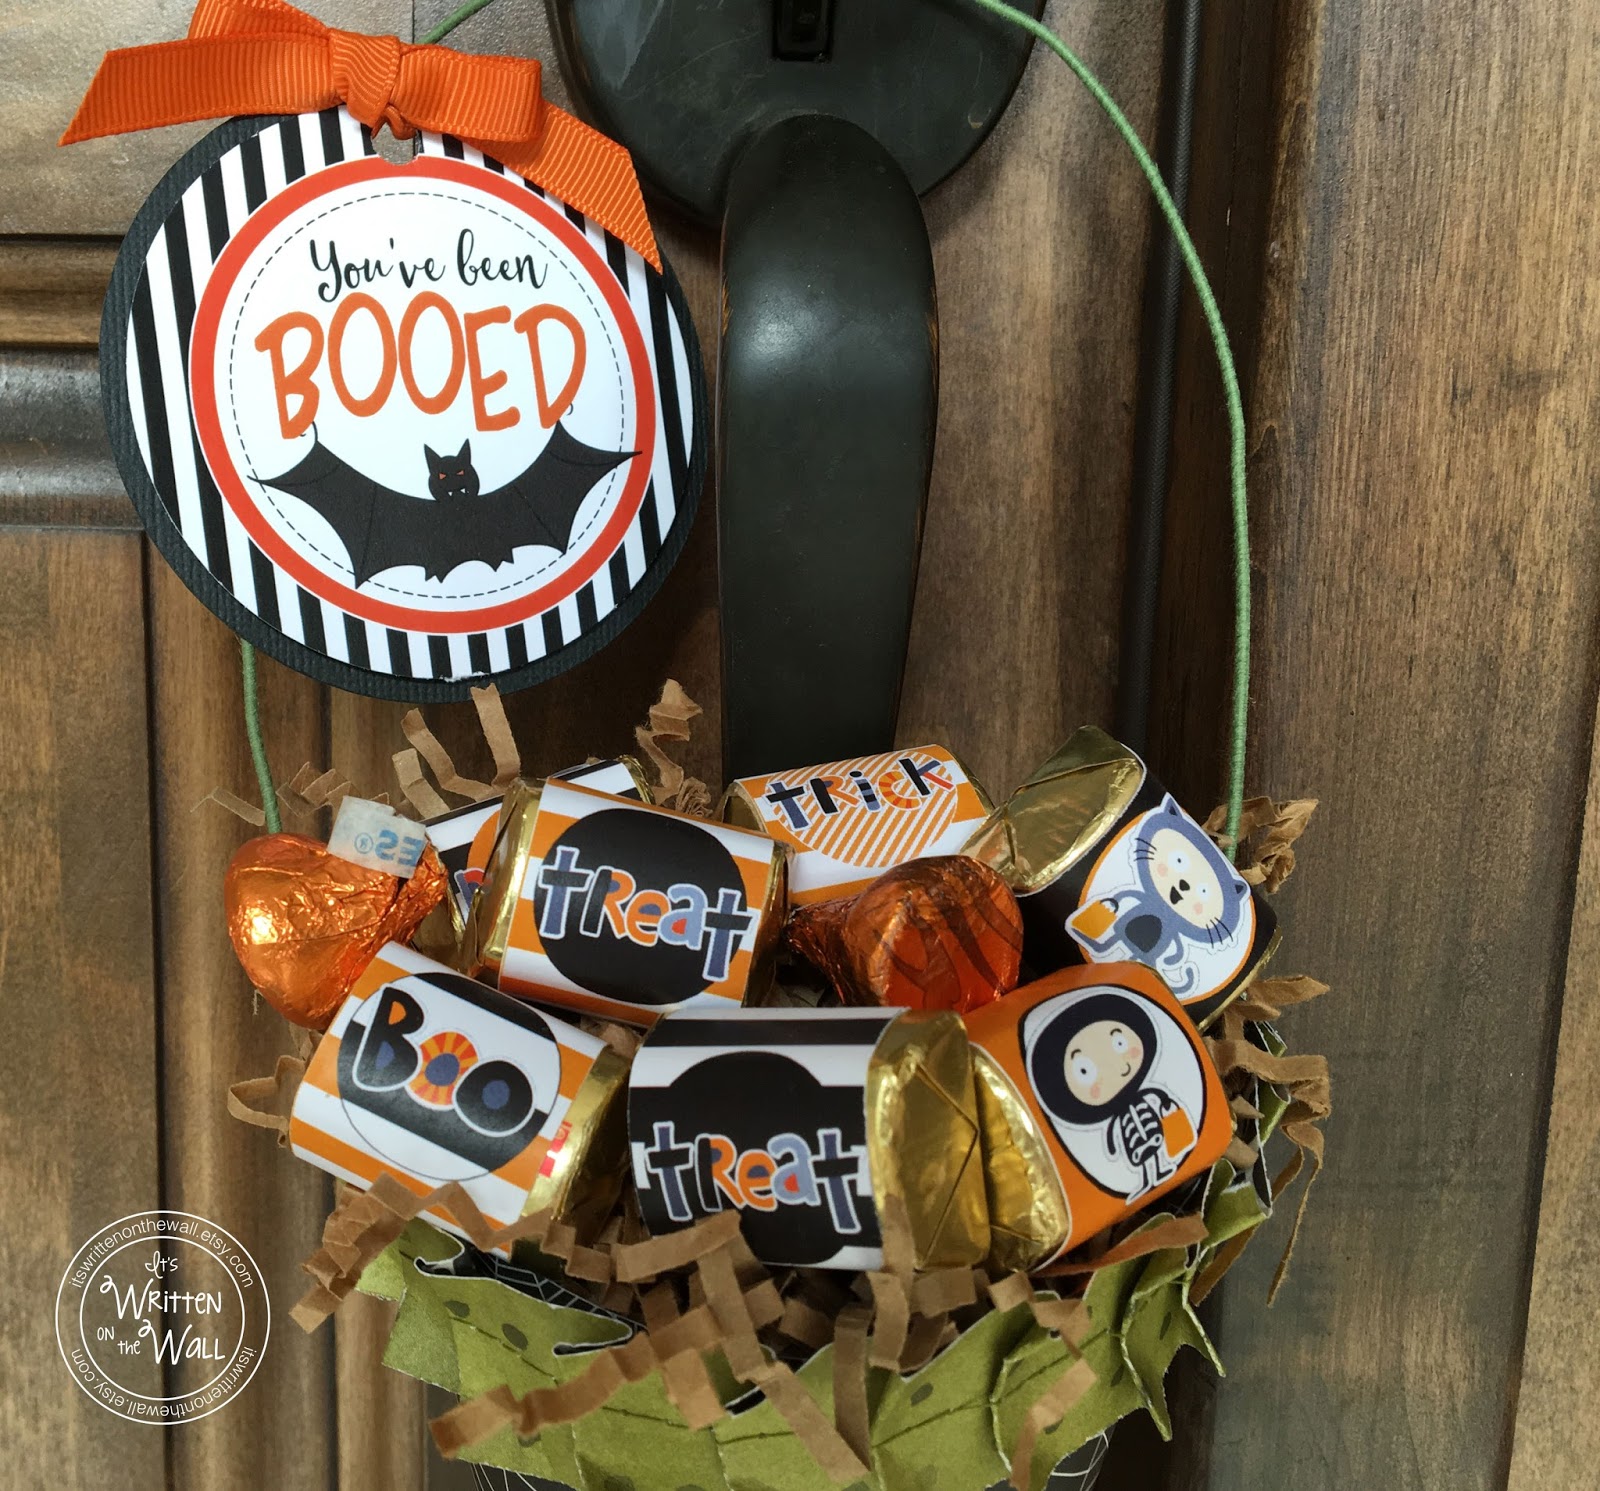


Be sure to use a sturdy piece of wire for the handle so it won't bend when you put it on the door knob of your neighbors and friends.  Our Halloween Hershey Nugget wraps are available HERE.


I like the looks of a stitched ruffle over one that is just folded but both options work.  


You can fill the entire cone with treats or just on the top as shown. We added the "You've been booed" tag on the handle of this one instead of putting it on the front.  They are very quick to make and make such a great gift for neighbors, friends and family....even co-workers and others.

This one shows the ruffle that is only folded. It looks nice too. We filled it with Hershey Kisses with our Halloween Pumpkin tags.  They are available HERE


Our Square Pumpkin Halloween Kiss Tags are available HERE


*FOLLOW US* 
ETSY    INSTAGRAM  BLOG  PINTEREST  FACEBOOK


Enter your email address:


Delivered by FeedBurner

Friday, September 13, 2013

You've been BOOed Halloween Printable + 8 Treat Tags and Photo Tutorial


You've been BOOed!  Such a fun Halloween tradition. Do you do it every year? We've designed a "You've Been Booed" sign for you to take to your friends and neighbors.  You know the drill.....in the cover of night you sneak up your neighbor's sidewalk and leave a goody on their front porch and then run like the devil after ringing the door bell.....Lots of fun!   

Click HERE to get these Halloween Tags and You've been booed printables


Here are the 8 different tags that you punch out using a 2.5" round paper punch or a 3" scallop or round paper punch. We also put a black scrapbook circle on the back that measures 3.25" round.  Then attach them to the treat holder below, as shown or attach to bags of candy, a candy bar, popcorn ball or any treat. You could even give a "Special treat" to some of your trick-or-treaters     Below is a fun way to package the treats you're taking to the neighbors....It's a Halloween Candy Cone. The tutorial is below. Yeah, you've got this! 


Makes a great Teacher Appreciation gift too!


Fun Treat for Halloween Neighbor Gifts


Form the cone from a 12" x 12"  piece of double sided cardstock. (Halloween themed paper) Apply glue (glue stick) to one paper edge and gently roll full sheet into large cone. Trim top edge even. Hold cone together for several minutes until dry. Glue two small circles, one on each side of the cone. Punch a hole in each circle. Use an 18" piece of wire and bend into handle shape. Insert wire ends through holes and bend to secure.


After cutting out the three  1 1/2" x 12" strips and inking the edges, overlap and adhere ends together to create one long strip.  Fold  the strip to create the ruffle look and staple and/or glue pleated strip around top of cone. You can either leave the ruffles sticking out as shown above, or lay them flat on the cone.


Here is your finished product. Choose one tag from the 8 that we have designed. Ink the edges and attach to the cone using a foam tab(s)   The measurement from the top of the wire handle to the bottom of the cone is 19"  Your neighbors will be thrilled!


The good thing about the wire handle is that you can slip it over any door knob, or in this case, where there was no door knob, we put it over the top of the latch. Don't forget to include the "You've been booed" sign and instruction sheet. Just roll them up and slip them into the cone too.  (you might want to print off more than one copy so they can easily "Boo" someone else)


We filled the bottom inside of the cone with paper since all our candy fit in the top. If you want to fill the entire cone,  leave out the filler and just add crinkled paper in the top.


 Fill  your Halloween cone with your favorite homemade or store bought sweets. (Pkg of cookies, brownies, muffins, caramel popcorn, nuts, granola bars, caramels....or whatever your family and friends are always begging you to make for them, you know, your very special treats.

Click HERE to get these cute Halloween Tags and "You've been BOOed" Printables.


You can also make a smaller version of this cute Halloween treat cone.  We cut a 8" x 8" piece of scrapbook paper to make the cone. Then we cut out 2 pieces of 1" x 12" strips and folded like a ruffle as shown above. For the tag we used a 2.5" round paper punch which cut off the stripe paper. Instead of using a foam dot to adhere to the cone we just glued the entire piece to the cone.


Our Hershey Kiss tags in a Halloween design are available HERE


We had some darling Halloween ribbon that we were dying to use on this treat container instead of the wire.  We used kraft crinkle paper to fill the cone.  You  could use less crinkle paper so the candy sits down inside the cone, but it's up to you. The ribbon is actually more sturdy than the ribbon. You could even put the cone inside a clear cellophane bag if you've got a lot of goodies inside.


NEW HALLOWEEN CANDY BAR WRAPS:
Check out our Brand New "Halloween Candy Bar Wraps" for Hershey chocolate bars.  They would make a fun "You've Been Booed" treat for your neighbors and friends. Fill the fun container above with Hershey candy bars wrapped with these Halloween wraps!


CLICK HERE to get a set of these 6 wraps. Print as many as you need for personal use. Then you can use them next year too.  


Thanks to Crafts 'n things craft magazine for our inspiration.  October 2012 edition.


*FOLLOW US* 
ETSY    INSTAGRAM  BLOG  PINTEREST  FACEBOOK


Enter your email address:


Delivered by FeedBurner