Showing posts with label Thanksgiving decorating ideas. Show all posts

Saturday, October 12, 2019

(Tutorial) Thanksgiving Paper Pumpkin and 12 Tags......So Many Possibilities!


 (We're back with this fun pumpkin tutorial and the Thanksgiving tags!)
Now here's a pumpkin that will last and last. These paper pumpkins are
 great for a centerpiece for fall, Halloween and Thanksgiving. 
(just choose the appropriate cardstock for each holiday)
 We made them for our Thanksgiving table for the decorations 
down the middle of the table but it would also be nice to make a 
different one for each guest and place them at the top of their plates.


Click HERE to get the 12 Thanksgiving tags 
See photo of all tags below


TUTORIAL:
We used double-sided scrapbook paper so a color/design shows through 
on the inside.  We cut 12 strips   7" tall x 1" wide.  Punch a small hole in
 each end.  We inked the edges of the strips but this is an optional step. 
We bought both scrapbook papers at Archivers  The acorn print paper
 can be found HERE and the orange print can be found HERE  
Buy it online or ask for it at your local craft/scrapbook paper store.


Choose two brads that match your scrapbook paper. Put one in each end. 
Then bend the strips in the middle (so it looks like a capital C) 
Then start making the circle by pulling out each strip.


This is what the pumpkin will look like when you've got
 all the strips pulled into a circle.


We used the EK Success leaf punch for this project.
 (Find it HERE and HERE) The leaf measures 2 1/4" top to bottom
 and side to side. If you want your leaves to be two different 
colors just cut out two leaves, (2 colors) Cut one of the leaves
 in half  and glue on a a whole leaf. Then score or fold the leaf
 down the middle and on the sides. We inked the leaves
 in a chestnut brown ink.


If you don't have a leaf punch you could either draw 
and cut out your own or use silk leaves. Real leaves is a good option too.


You could use all one color for your leaves or multiple colors. 
Choose colors that match the pumpkin paper. They don't necessarily
 have to be green. We used the brad as an anchor for the stem, leaves and tendrils.


Cut out the stem 6" x 1/2" and curl as shown above.  
Cut tendrils 1/8" to 1/2"  x 6" (depending on what you like) a
nd wrap around a pencil to curl it.  The pumpkin measures 
16" around and 4" tall, without the stem and 6" tall, with the stem. 
You can make these pumpkins larger if you like, just cut the strips a little longer.


There are 12 different "Give Thanks" Tags for you to choose from.
 Just back each tag with a 2" scallop or round punched paper. 
Ink before putting it together. We used foam tabs to attach
 the tag pieces to each other. 


We've made up 12 Thanksgiving tags and want to share with everyone.  
We cut the white tag using a 1 1/2" scallop circle. The back piece is cut 
out of a 2" scallop circle. You can use round punches too. Add your
 favorite kind of embellishments and make them even more unique!

Click HERE to get the 12 Thanksgiving Tags
(print out as many as you need) 


Here is our second sample. We used a piece of scrapbook paper 
that was double sided and flipped every other strip to get this look.  
You may want to bend the leaves a little so they hug the pumpkin.


*FOLLOW US* 
ETSY    INSTAGRAM  BLOG  PINTEREST  FACEBOOK


Enter your email address:


Delivered by FeedBurner

Friday, November 4, 2016

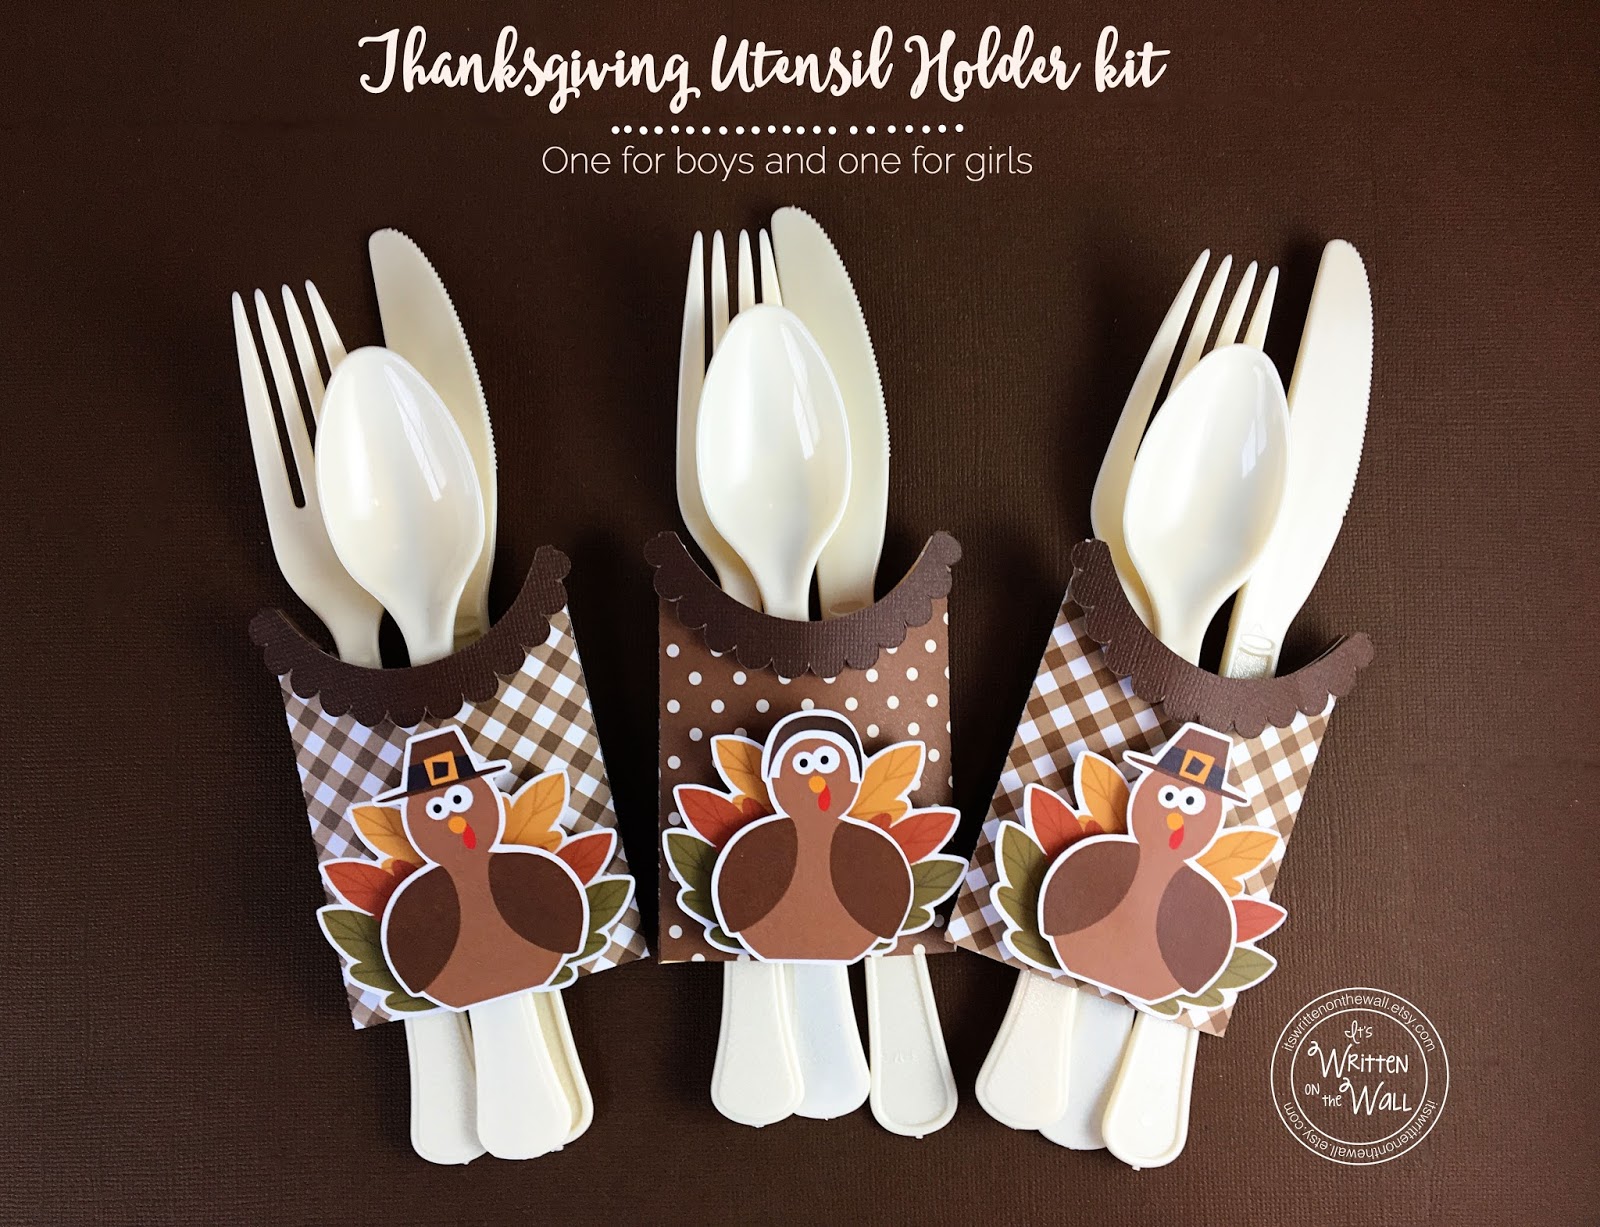
Check Out These Cute Thanksgiving Turkey Utensil Holders-The Kids Will LOVE Them!


I absolutely love Thanksgiving. It's a beautiful time of year with the fall colors, the cooler weather, the football games and more. We've cooked Thanksgiving dinner every year for as long as I can remember. Love the turkey and the stuffing and all the sides, but what I really love is decorating the Thanksgiving table AND especially the kid's table. We designed this cute utensil holder with the kid's in mind but you could also use them for the adult table.


Here's what the back looks like.  The boy turkey is on the plaid holder and the girl turkey is on the polkadot holder. After I got done designing this I realized I was influenced by a very old felt picture that we had when I was growing up. It was a picture of a  man and a woman made entirely of felt and dressed in clothing from the 30's. The woman had a scalloped collar around her neck and that's where the idea of the scalloped trim piece came from. The picture reminds me of the Thanksgiving season and I really liked it. Funny how you are influenced by things that you don't even realize.


You could also put our Thanksgiving Turkey Toes treat at the place setting. Its such a fun treat for everyone, especially the kids.Its a Kit that you assemble.  Everything comes already cut out and ready to go.  CLICK HERE to get our Turkey Toes in a kit and instant download


For this kit you can order however many boy turkeys or girl turkeys holders that you need, even all boys or all girls. We gather together all the supplies you need to make these Thanksgiving utensil holders.  All you add is the silverware.  We bought these sturdy, reusable, cream colored forks, spoons and knives at Zurchers Party Store.

CLICK HERE to get the kit that's the perfect size for your Thanksgiving table.


*FOLLOW US* 
ETSY    INSTAGRAM  BLOG  PINTEREST  FACEBOOK


Enter your email address:


Delivered by FeedBurner

Monday, November 10, 2014

A Cute Wood & Paper Pumpkin for your Thanksgiving Decorations-Super Simple to do!

I had so much fun putting together this Thanksgiving wood pumpkin.  Super simple, just takes a little planning on what papers to use. I plan on using it as a centerpiece for my Thanksgiving table. 


You can use any kind of leaf, even something from your yard and you could use real acorns too. The leaves are our design. We didn't have time to make them available in our Etsy shop but will offer them next October/November with lots of other fun ways to use them.


Glue the paper onto the wood and when dry use a piece of sand paper to distress the edges. You could then ink the edges if you like. We used regular old Elmer's glue to attach the paper to the wood. It worked great and dried fairly fast, especially if you don't put a lot of glue on each piece. 


We wrapped wire around the stem and then twisted some for the tendrils.  We picked up the wood kit at the  Wood Connection store in American Fork, UT  (the leaves and acorns are ours, the wire you can purchase there too)  They also carry scrapbook paper and the wire there too. 


We covered the front and the back with the same brown polkadot paper and then covered the sides of each piece and the top in a light brown paper. The stem was a textured yellow.  We glued all the leaves to the bottom of the stem and added the acorns using foam tabs to make them stand out from the leaves. Then tie a ribbon around all the wood pieces to hold them together.  Since the back and the front are covered you get a nice view no matter how you look at it. 


Subscribe to our Blog
Enter your email address here:


Delivered by FeedBurner

Monday, November 5, 2012

{Tutorial} Thanksgiving Crayon Holder/Place Card for the Kids Table

We've designed something for the kids that has a dual purpose. It's a place card AND a crayon holder. It's something that will make the kids table looks great and give the kids something to do while you're get dinner ready. It may be something the kids can help you put together too.


    There are two different turkey's in this tutorial plus a free tag....there are a lot of different ways to make up this box. See all the photos below.


 We put the kids names on a piece of paper measuring 3" long x 3/4" wide.(we inked it using chestnut brown ink from American Crafts)  I used vinyl lettering for the name but you could certainly hand print them. This box will hold 24 crayons. When I went to purchase the crayons the 16 count box was $1.29 and the 24 count box was $1.49. This way you give the kids lots of choices for coloring and they fit nicely inside the box.

 Instructions for the Thanksgiving Crayon Box/Place Card
Use your favorite autumn colored scrapbook paper and cut 6" x 4.5". Score in on every side 1 1/2".  Fold at the score lines. Cut out the piece on the top and the bottom as shown above.


I used a glue stick to put the box together and it didn't hold as well as the double-sided tape so I recommend the tape. Make sure the triangle shaped flaps are on the inside.


If you want to apply ribbon to the box cut out a strip 4" long and glue with double-sided tape to the box. I used a glue dot on each end of the bow piece. Meet each end of the bow piece in the middle of the ribbon and then, using another glue dot to attach the middle strip.


 Cut out the edge pieces with two measuring 3" x 2" and two measuring 2" x 1 1/2".  Then score each piece in at 1/2"


Use double-sided tape on the outside edge and attach to the box. Then put another piece of double-sided tape to the inside flap and attach to the box.


The finished box measures 3" long x 1 1/2" deep

Instructions for Scalloped Feathers Turkey 
For this turkey you will need a 2" scallop paper punch and a 1 1/2" scallop paper punch.


 Cut out two scallop feather pieces, one body back and a body front. The body front is in the shape of a peanut or a bowling pin (however you look at it)  It measures 2" tall and 3/4" wide. Cut out a small triangle for the beak. Instructions for cutting out the waddle are below. Use the smallest googly eye you can find, but you could just draw in the eyes if you like. EK Success has both sizes of scallop punches on their web site.


 Stack and stagger the feathers and the body back and glue together. We used paper with polkadots but you could also use a solid color and add another scallop feather piece.

Instructions for Multi-Feathers Turkey
If you don't have a oval paper punch (and I didn't) you can make them using a circle paper punch. We used a 2 1/4" round paper punch from EK Success.


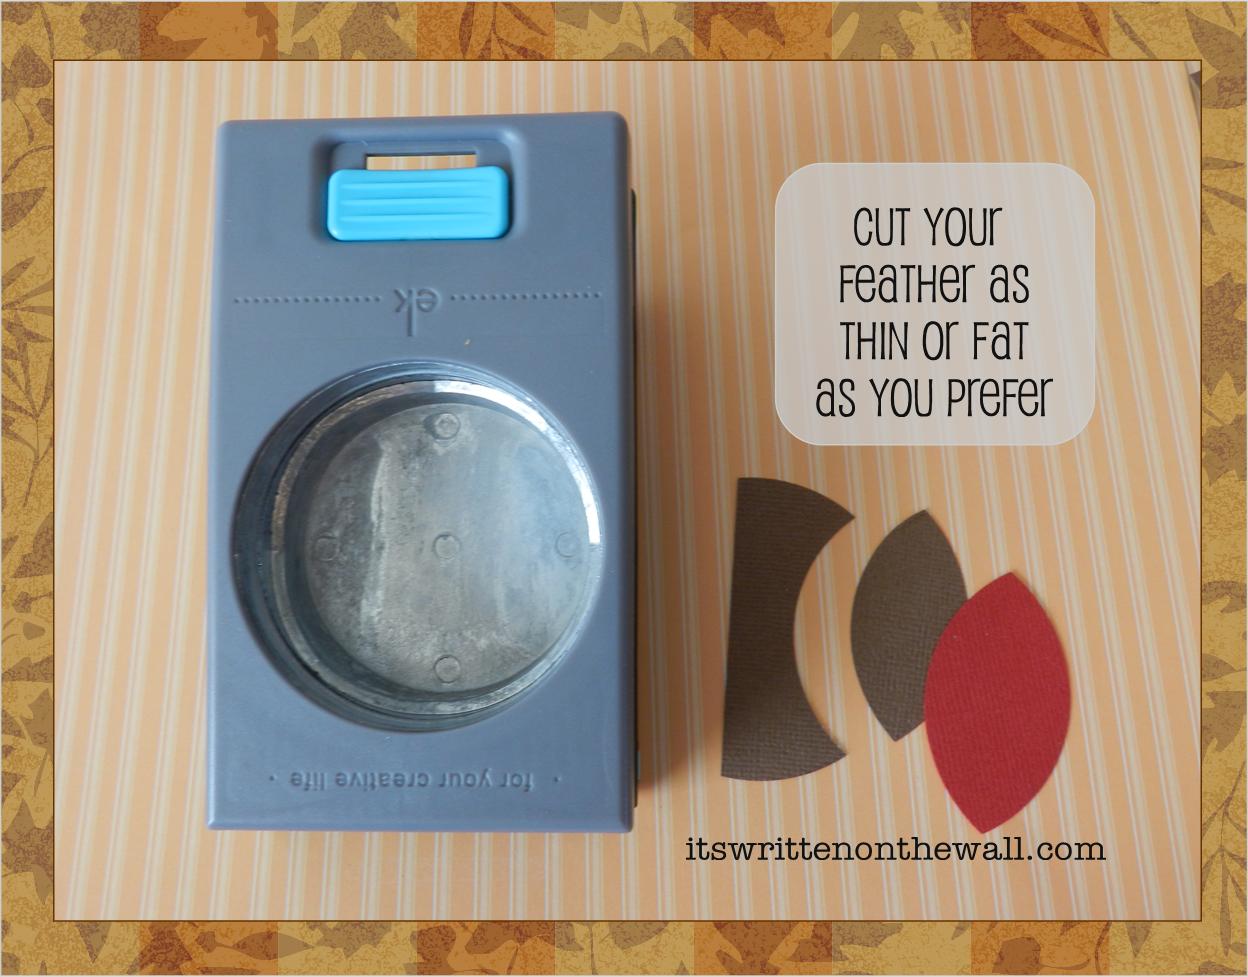
First cut out a half circle for your feathers using a 2 1/4" or 2 1/2" round paper punch.


Put that half circle piece back into the circle cutter as shown above and you'll have your feather shaped pieces.


Shown above is a thin feather and a fat feather . I would suggest doing this step using scrap paper that you aren't using for your final feathers, just until you get the hang of it.


 We used a 1 1/2" scallop circle for this step but you could use a larger one too. Then put the circle back into the paper punch and just cut a small piece/edge for your waddle.


This is how you put your turkey together. Use as many feathers as you want, The top sample of feathers has been inked and the bottom ones are not.  

Now you've got something fun for the kids table. Something that is festive and will give the kids something to do while you get dinner on the table.  Be sure to include their name on the crayon box.  


FOLLOW US:
Etsy Shop  
INSTAGRAM 
 BLOG  PINTEREST  FACEBOOK

Subscribe to our Blog
Enter your email address here:


Delivered by FeedBurner